User&Pass Auth
This article will provide you with how to use user&pass auth. The whole process is very simple. You only need to operate on the web page without downloading the application.
Please note that the package types supported by this usage method are ISP Proxies, Residential Proxies, Unlimited Residential Proxies, Static Residential Proxies, Long Acting ISP Proxies. This tutorial will use ISP Proxies as examples to explain.
01. ISP Proxies - User&Pass Authentication
Step 1 Basic settings
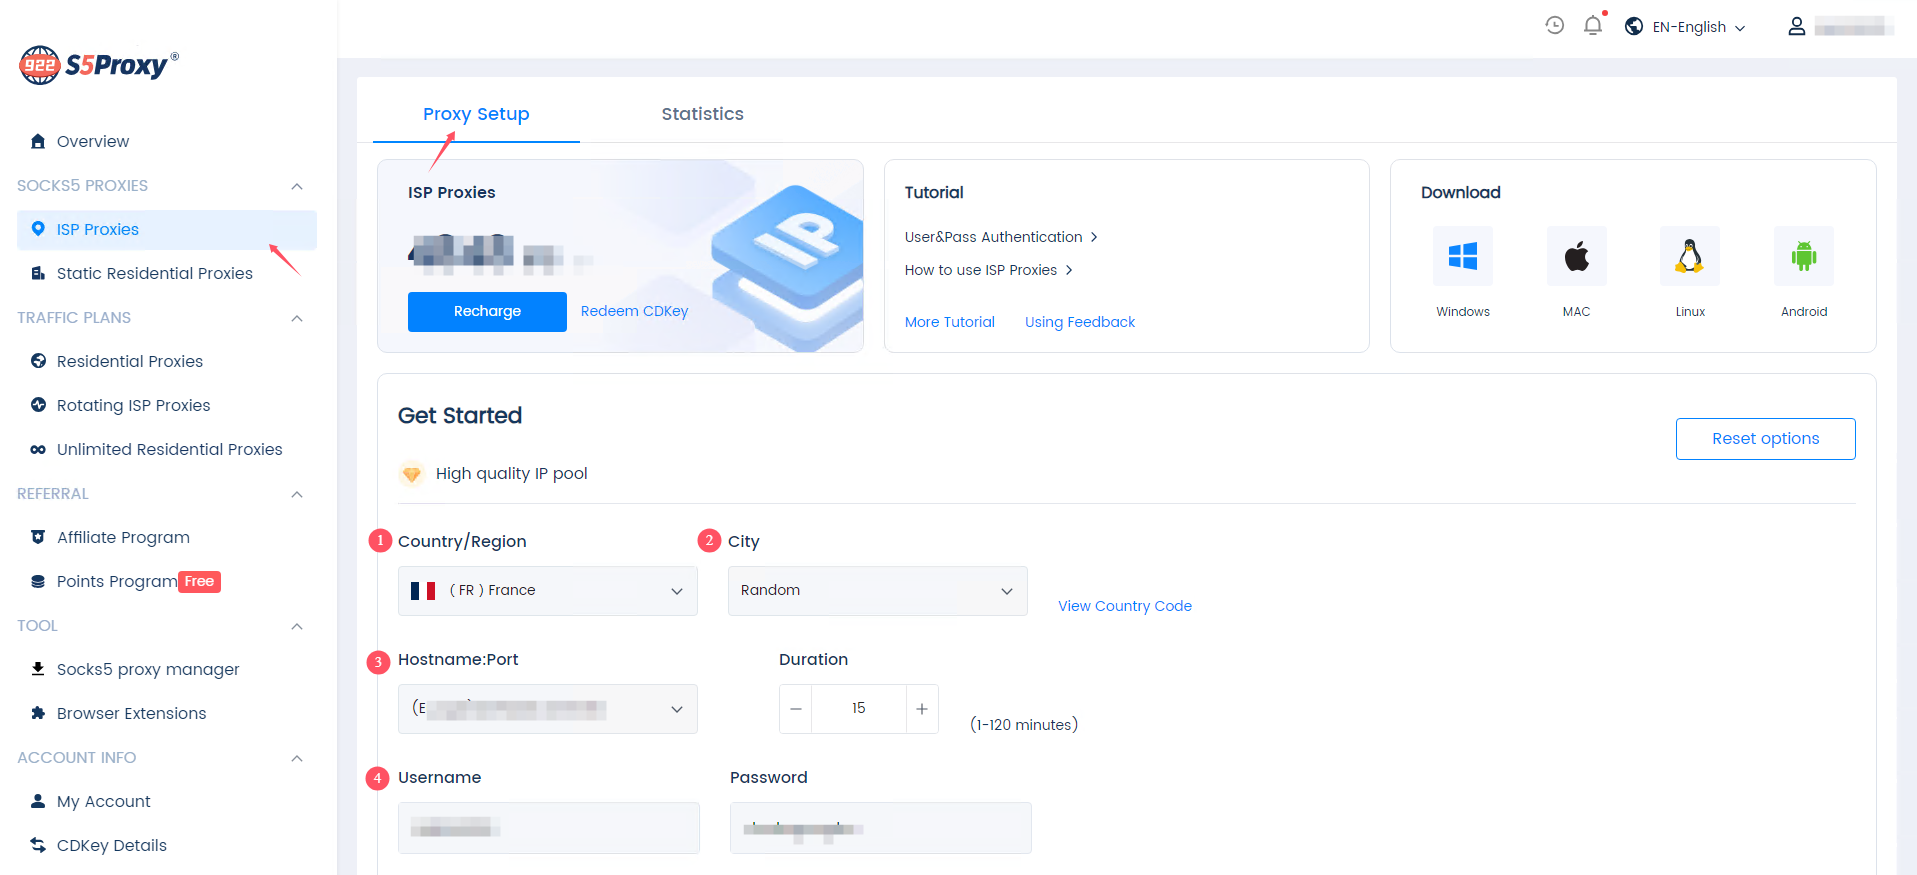
Enter Personal Center-ISP Proxies Dashboard-User&Pass Auth
1. Select a country. Choose an exact country or a random country. Click "Country Code" to view other locations.
2. Select a city. Choose an exact city or a random city.
3. Select Hostname:Port. The port is the port of the server, which is automatically assigned to the user. The port value cannot be modified.
4. Username: Password. By default, it is assigned based on the user's login account.
Step 2 Test command
Copy the code below, open a terminal on your computer and paste this curl address and press ENTER. (Only supported for use in non-Mainland China environments)

Step 3 Generate command
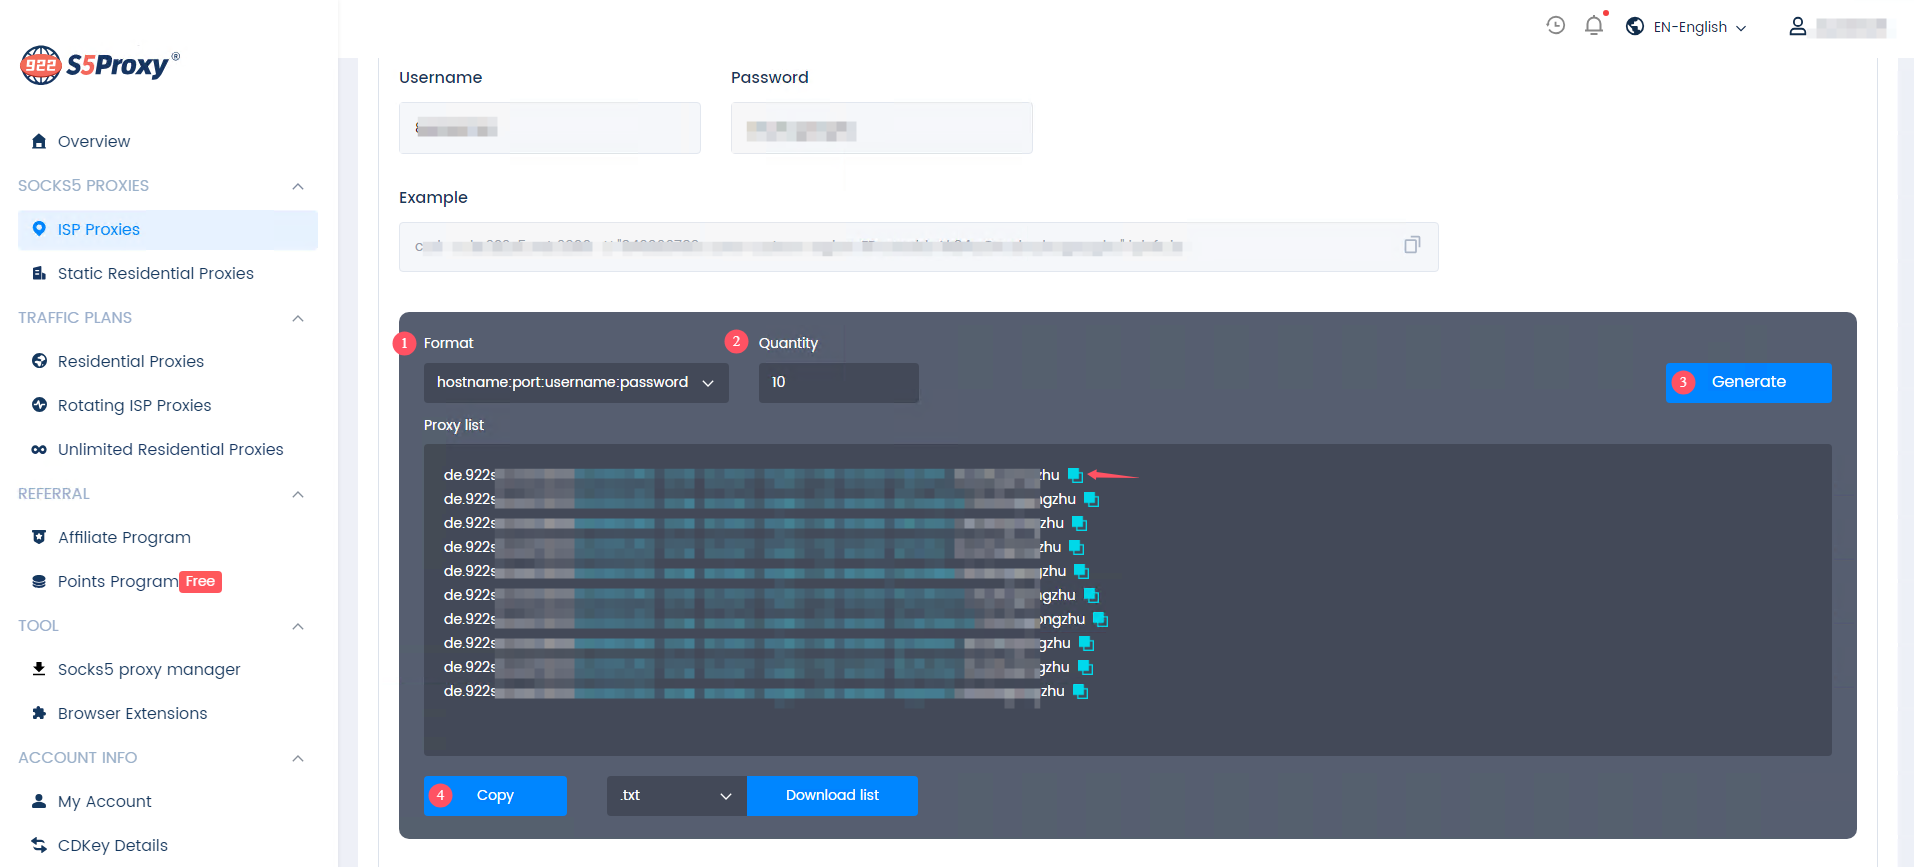
1. Select proxy user:pass format.
2. Select the generated quantity.
3. Click Generate.
4. Copy the proxy information. Copy the created proxy list to your clipboard, you can apply this to any application or tool and then you can use the proxy.
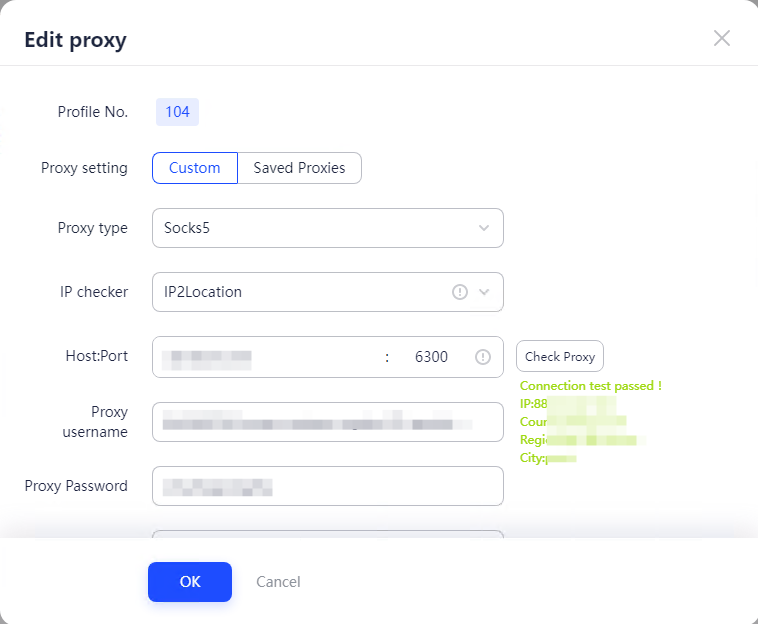
Example: Configure into an anti-detection browser
Paste the copied proxy information into Host:Port with one click, and the rest of the information will be filled in automatically. Click to detect the proxy, save it and launch the corresponding browser window to start using the proxy.
02. Residential Proxies - User&Pass Auth
Step 1 - Account Setup
Create sub-account
1. Enter the Personal Center-Residential Proxies dashboard, click "Sub-User" to enter sub-account management.
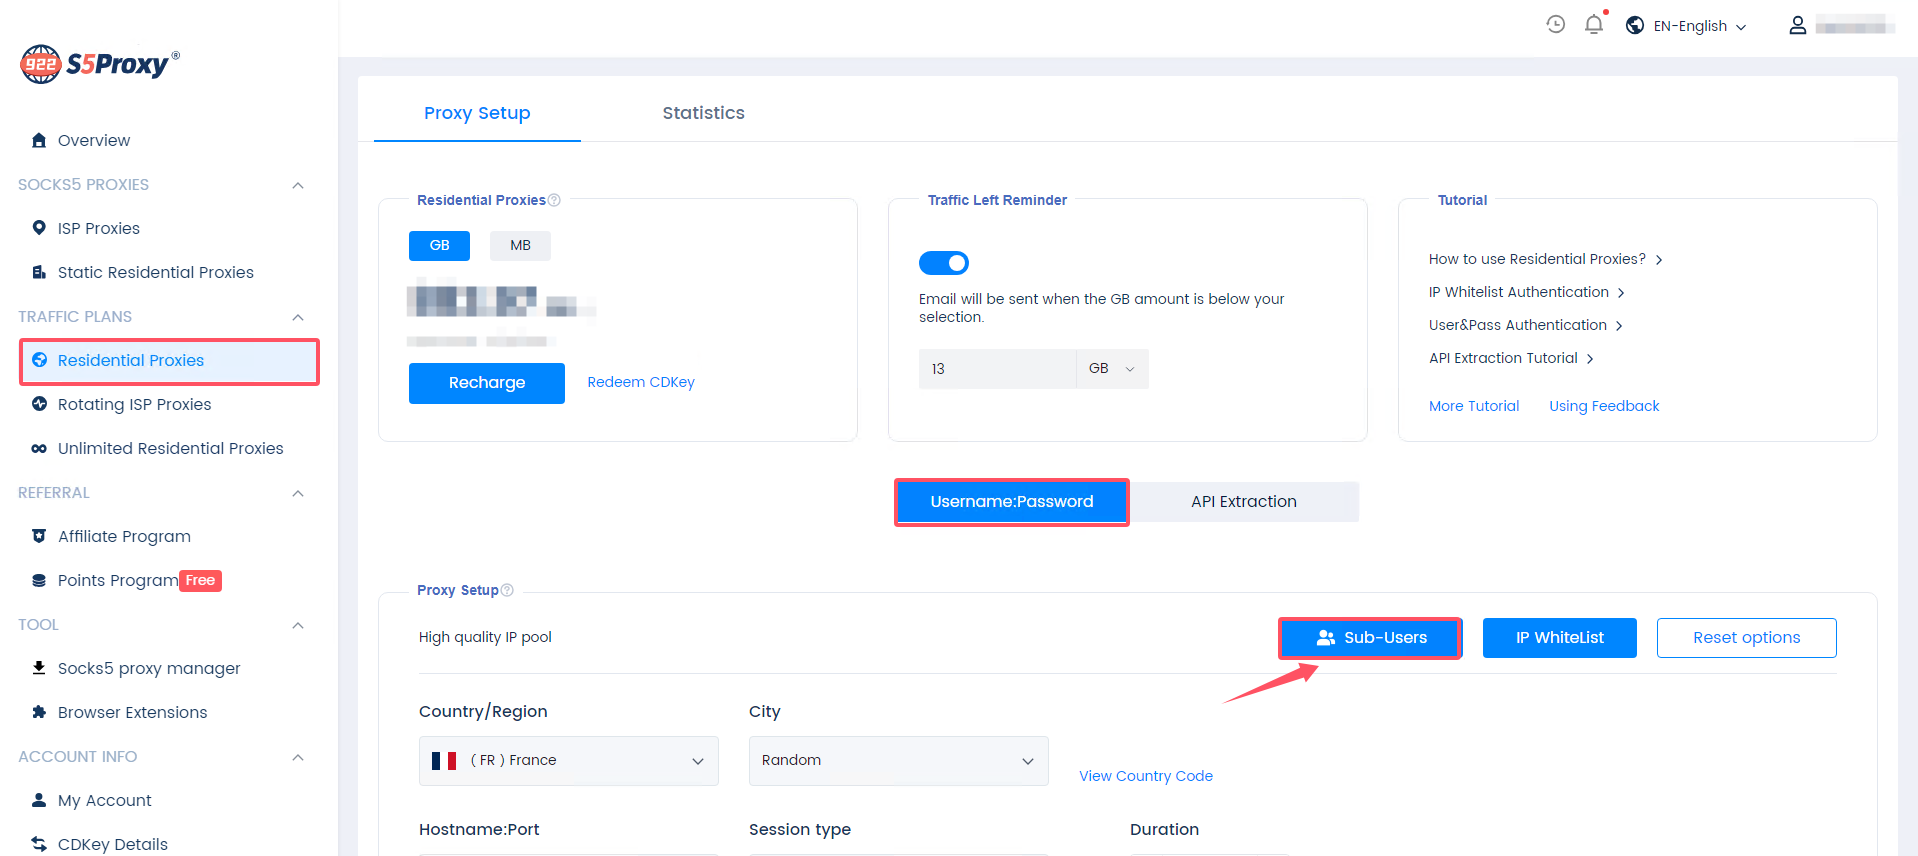
2. The master account will be used as the default account and automatically created in the account management list. You can choose to use the main account, or add more sub-accounts as needed to allocate the traffic balance to different accounts for use.
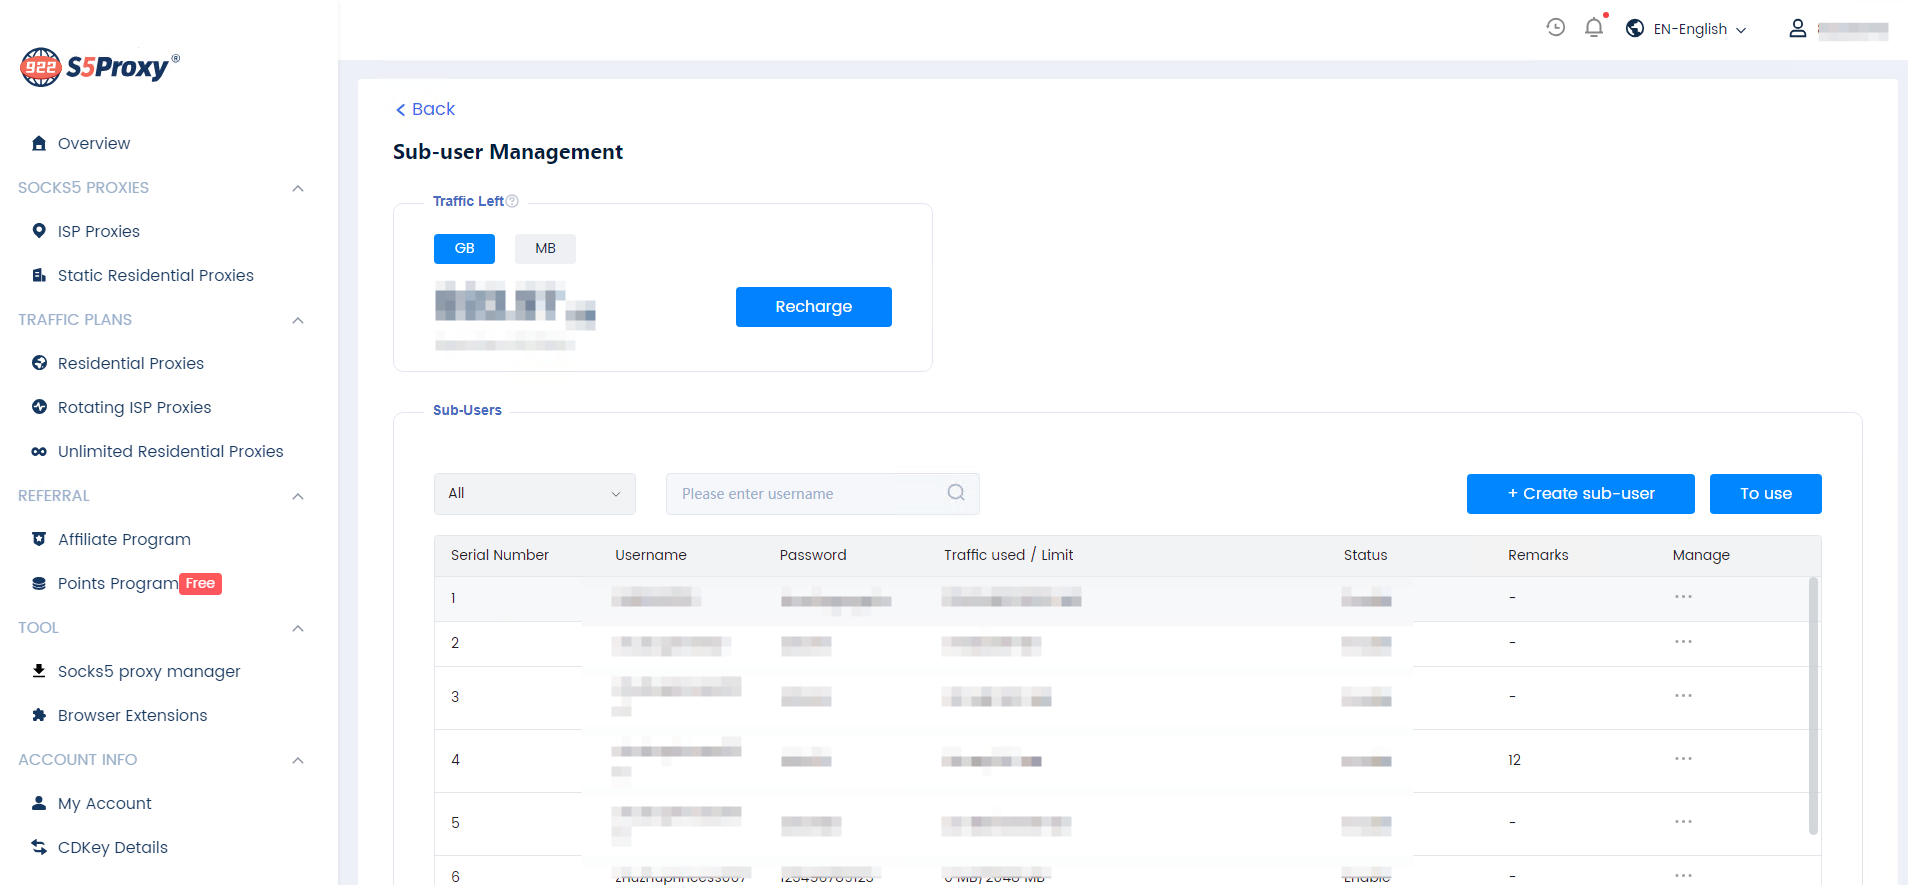
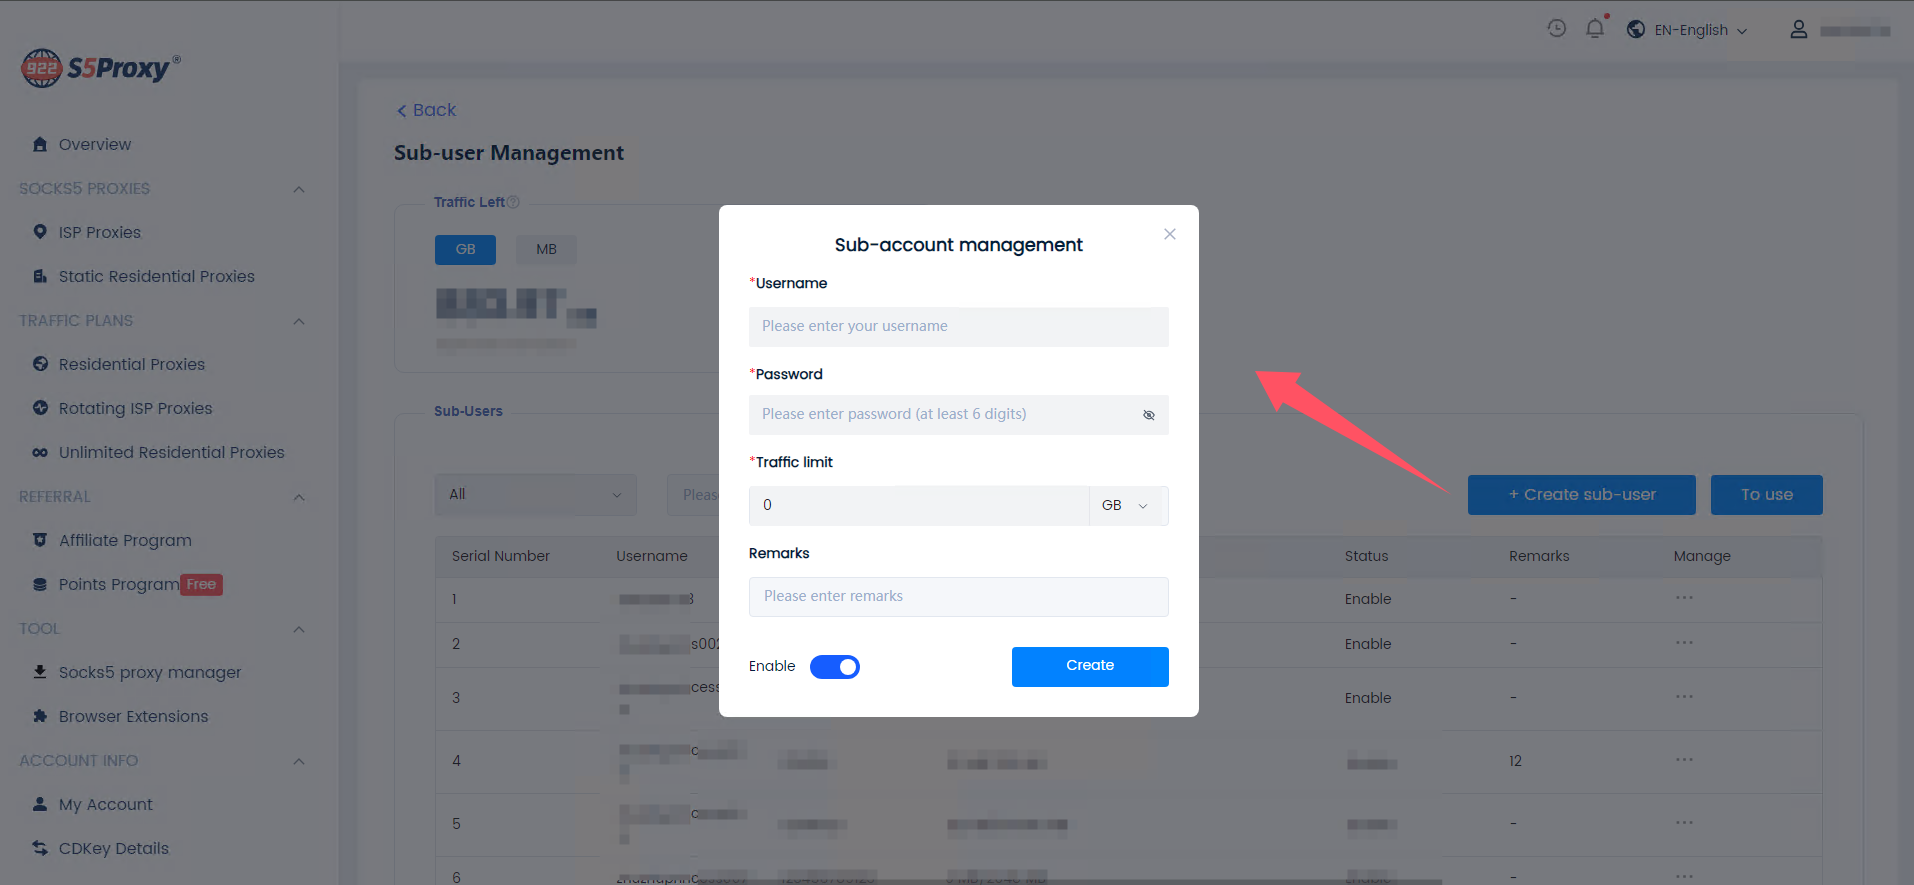
3. Click "+Create Sub-Account", fill in the user name, password, allocated traffic, remarks and other information, turn on the "Enable" status, and click Confirm to successfully create a sub-account. You can edit, delete, etc. sub-accounts.
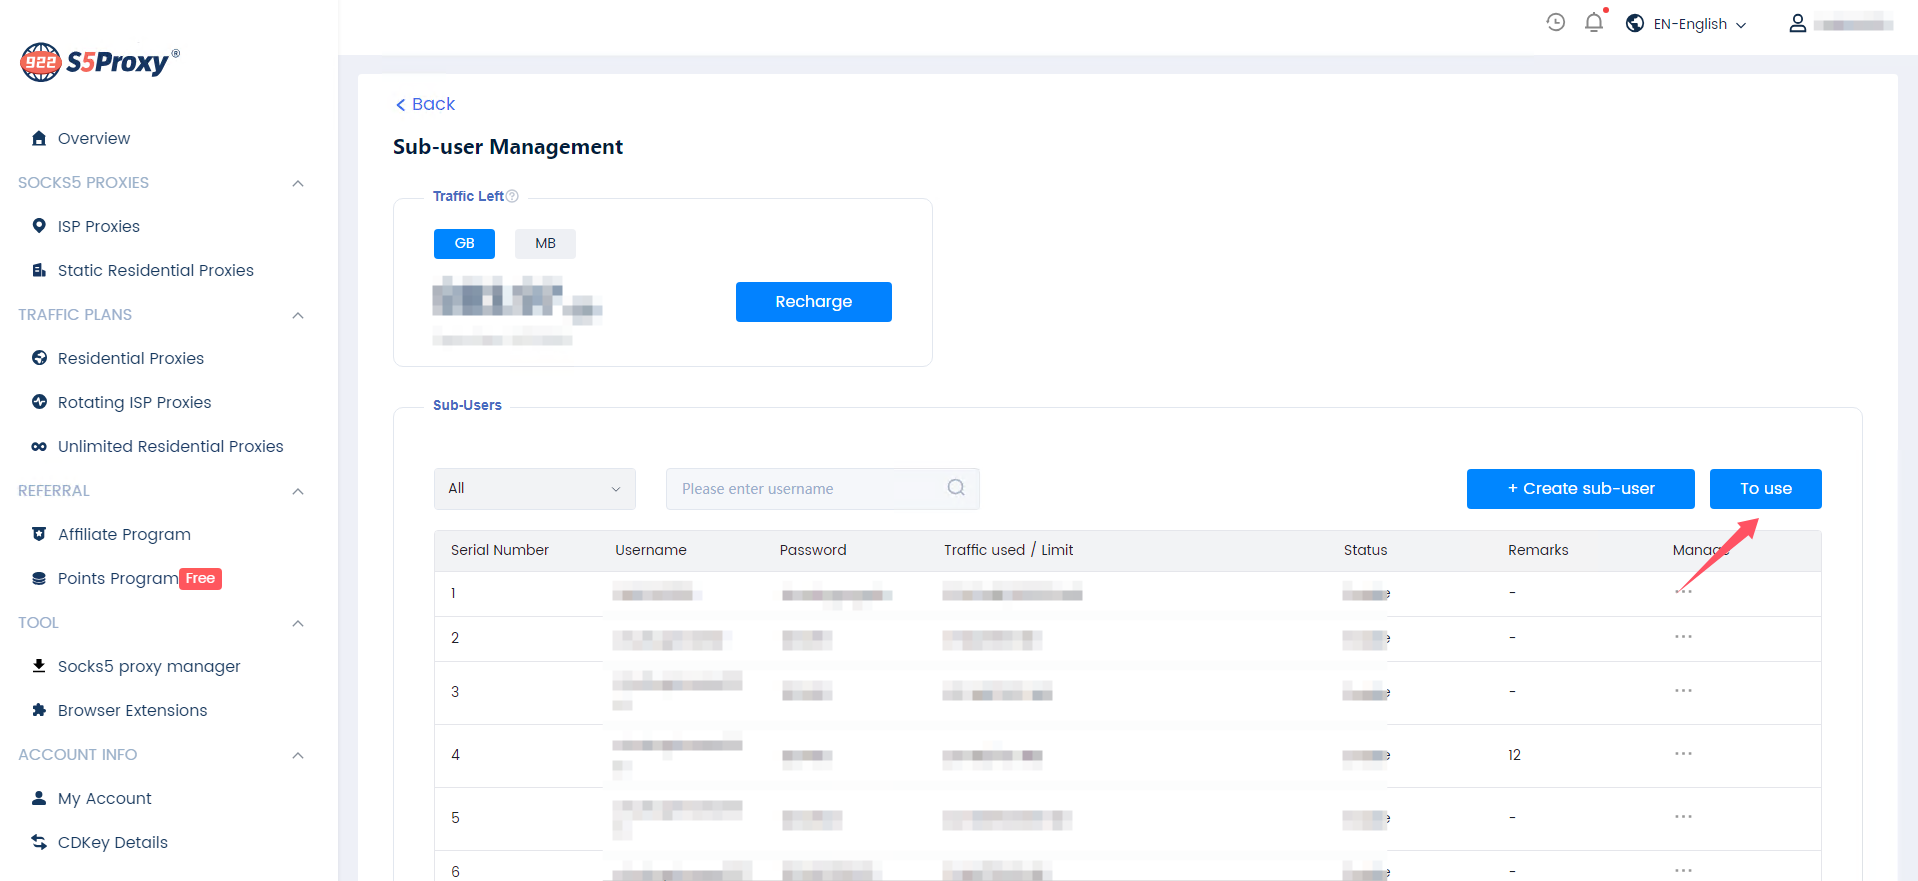
4. Click "To use"
During operation, make sure to follow the correct steps to prevent any unexpected problems from occurring. We hope you enjoy a more enjoyable product experience!
If you still have problems, don't hesitate to contact the customer support team (Email - [email protected]). Please provide your details so our support team can better assist you with your issue. We're always here and happy to help!
Last updated